Sub 60 Second Setup
Effortlessly integrate StudioForm components into your Webflow project in less than a minute, with everything you need already pre-installed.
1) Access and Copy Component
Open the component library application at StudioForm Library, select a suitable component and click on Copy Component.
%20Access%20and%20Copy%20Component.jpg)
2) Paste in Webflow Designer
Open the Webflow Designer on the desired page, select a parent element and press Cmd/Ctrl + V.
%20Paste%20in%20Webflow%20Designer.jpg)
%20Publish%20and%20Enjoy.jpg)
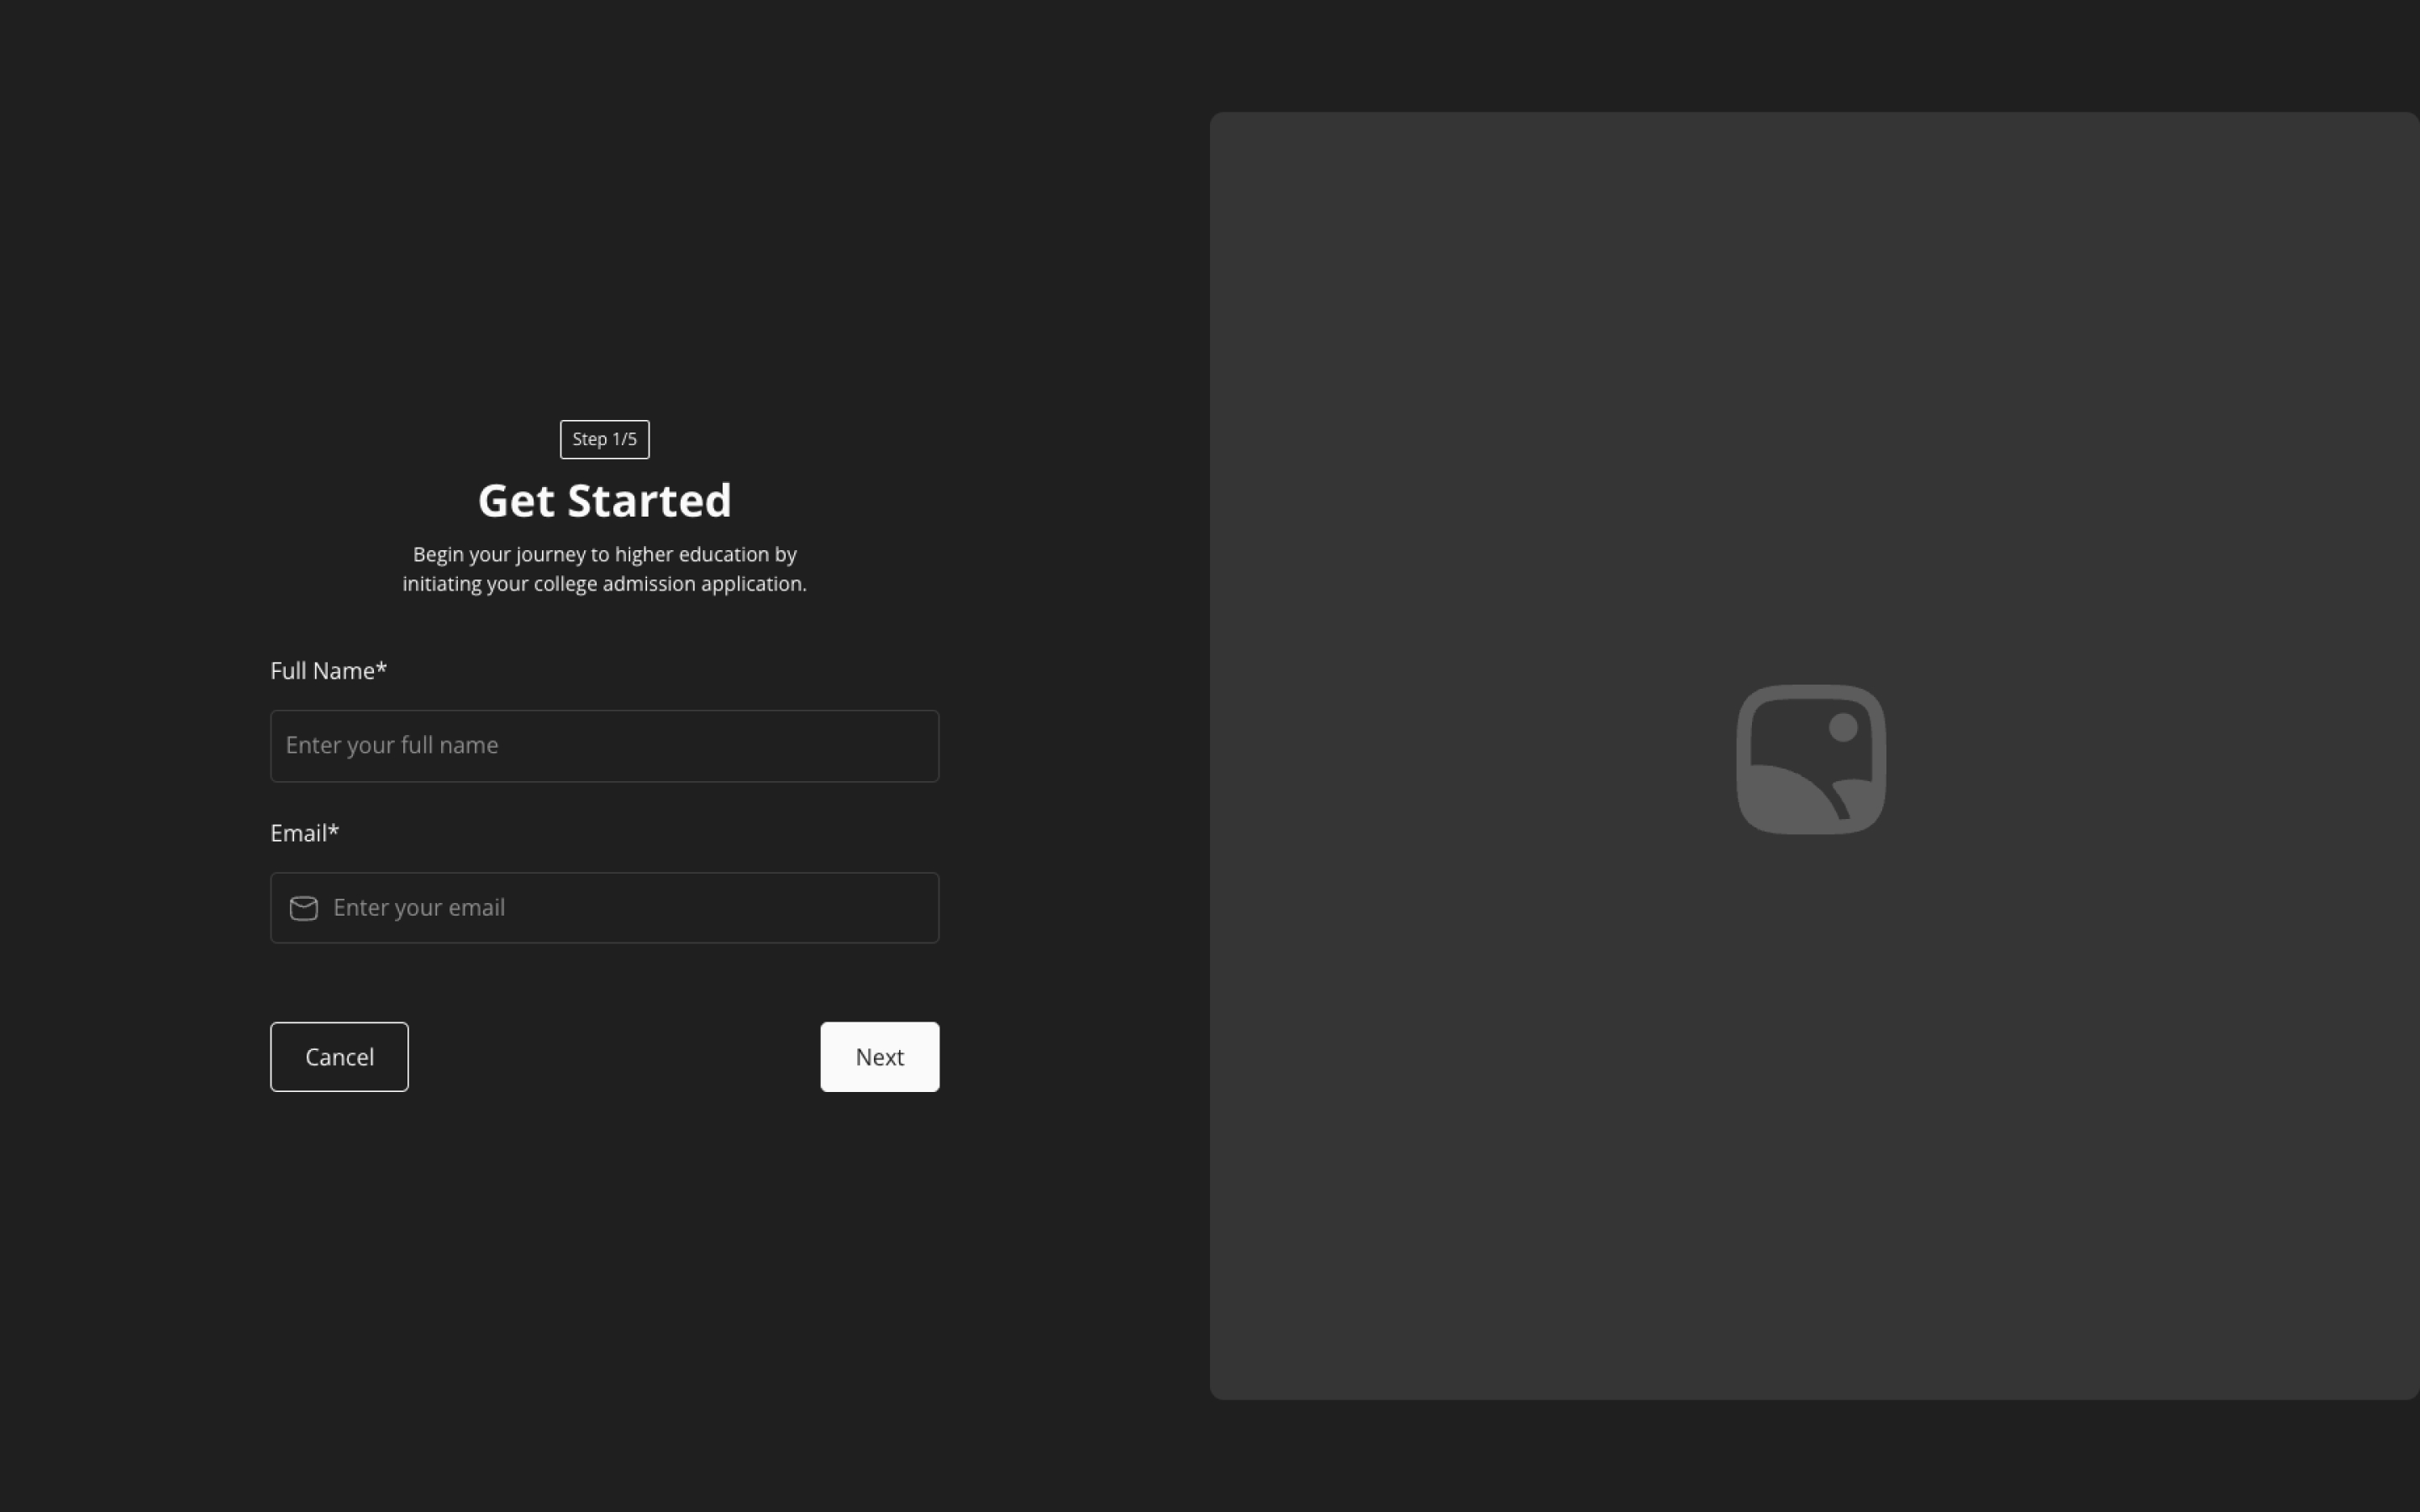
Manual Basic Setup
For the Manual Basic Setup, just add a code snippet and set some attributes. This gets your form working smoothly with StudioForm.
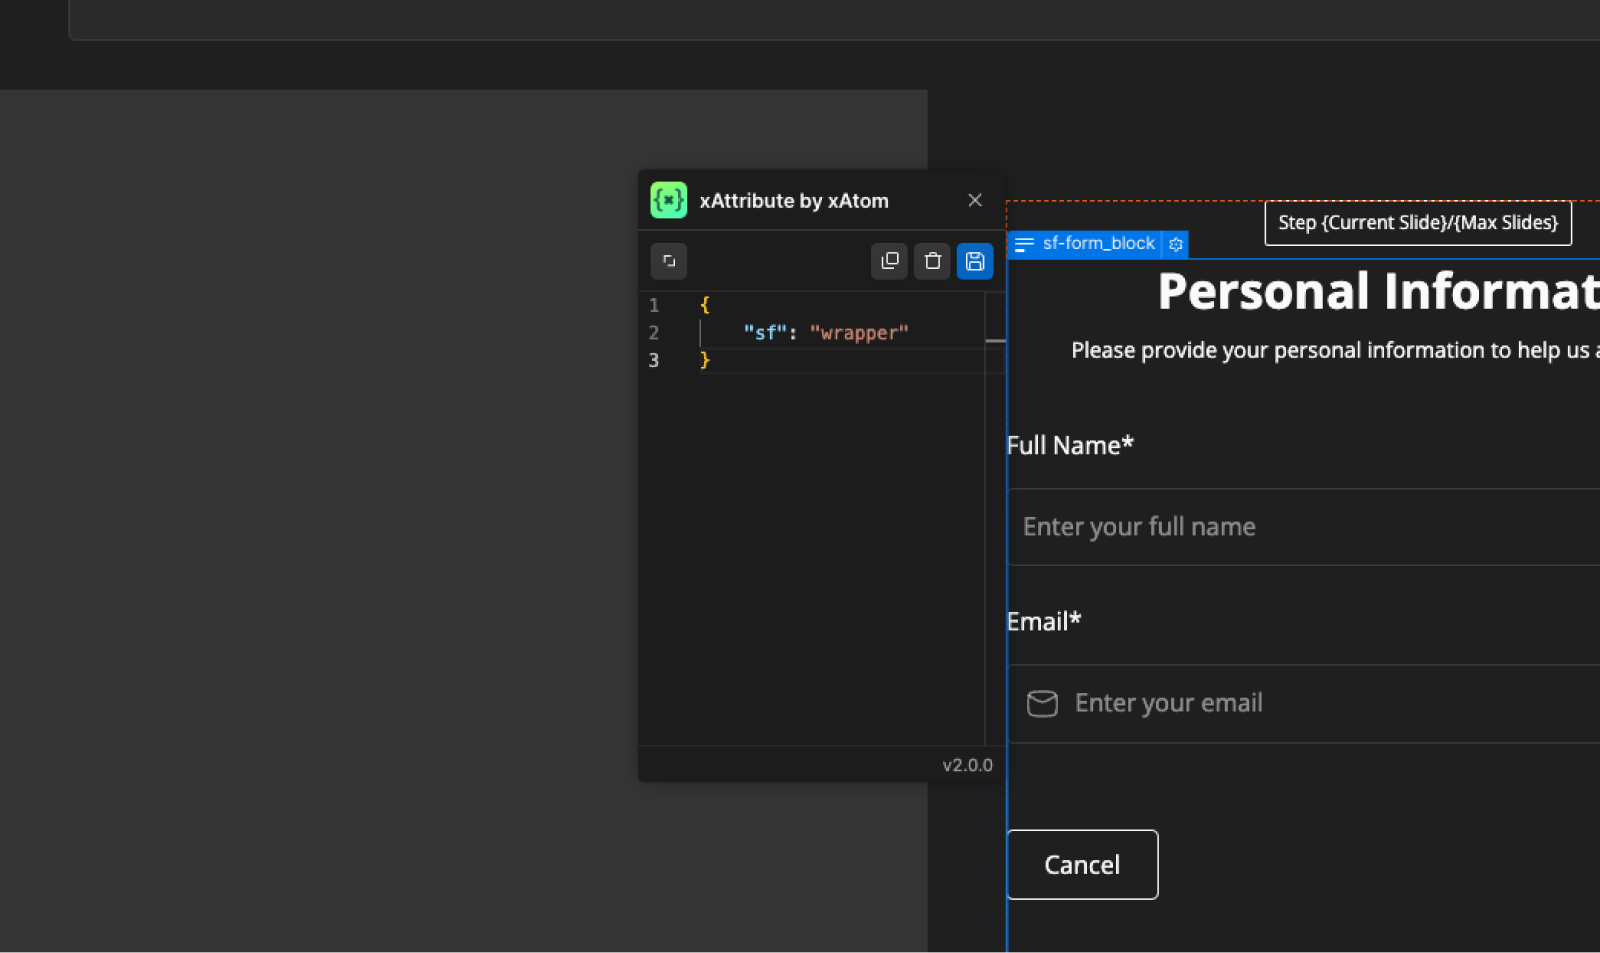
Integration with xAttribute App
To simplify the process, you can install the xAttribute app on your Webflow site. The xAttribute app allows you to copy and paste attributes seamlessly.
Normally, you would copy the necessary attributes by selecting them, but with the xAttribute app, you can copy and paste them more efficiently. You can install the xAttribute app through this xAttribute Webflow App.
Or you could install the app directly to your current project from adding the app from your designer.
On the top right corner you can switch on to see the xAttribute App based attributes than you can copy and paste.
1) Insert Code in Head Tag
Copy the following code snippet and paste it into the code section "Inside <head> tag" of your project settings.
<!-- [BMG] StudioForm -->
<script>document.head.insertAdjacentHTML('beforeend','<style sf-css>[sf="wrapper"]>form>*:not(:nth-child(1)){display:none}</style>');
window.StudioForm = window.StudioForm || []; window.StudioForm.push(() => document.querySelectorAll('[sf-css]').forEach(e=>e.remove()))</script>
<script defer src="https://cdn.jsdelivr.net/npm/@bmg.studio/form@1/sf.js"></script>
2) Add Attribute to Form Block
Add a "Form Block" to your page or use an existing one and add the following attribute to the "Form Block" element.